Wednesday, February 28, 2018

Node.js

JavaScript is quickly becoming the go-to language for web developers. Front-end web developers use JavaScript to add user interface enhancements, add interactivity, and talk to back-end web services using AJAX. Web developers who work on the server-side are also flocking to JavaScript because of the efficiencies and speed offered by JavaScript’s event-driven, non-blocking nature.
In fact, concentrating on JavaScript as your language of choice offers the opportunity to master a single language while still being able to develop “full-stack” web applications. The key to this server-side JavaScript revolution is Node.js® — a version of Chrome’s V8 JavaScript runtime engine — which makes it possible to run JavaScript on the server-side.
Node.js is also used for developing desktop applications and for deploying tools that make developing web sites simpler. For example, by installing Node.js® on your desktop machine, you can quickly convert CoffeeScript to JavaScript, SASS to CSS, and shrink the size of your HTML, JavaScript and graphic files. Using NPM — a tool that makes installing and managing Node modules — it’s quite easy to add many useful tools to your web development toolkit.

Prerequisites

Node isn’t a program that you simply launch like Word or Photoshop: you won’t find it pinned to the taskbar or in your list of Apps. To use Node you must type command-line instructions, so you need to be comfortable with (or at least know how to start) a command-line tool like the Windows Command Prompt, PowerShell, Cygwin, or the Git shell (which is installed along with Github for Windows).

Installation Overview

Installing Node and NPM is pretty straightforward using the installer package available from the Node.js® web site.
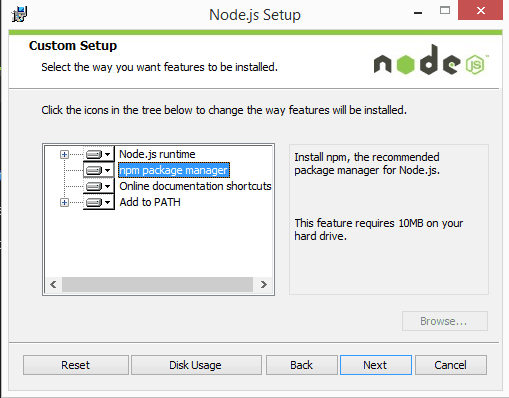
Installation Steps

  1. Download the Windows installer from the Nodes.js® web site.
  2. Run the installer (the .msi file you downloaded in the previous step.)
  3. Follow the prompts in the installer (Accept the license agreement, click the NEXT button a bunch of times and accept the default installation settings).
    installer
  4. Restart your computer. You won’t be able to run Node.js® until you restart your computer.

Test it!

Make sure you have Node and NPM installed by running simple commands to see what version of each is installed and to run a simple test program:
  • Test Node. To see if Node is installed, open the Windows Command Prompt, Powershell or a similar command line tool, and type node -v. This should print a version number, so you’ll see something like this v0.10.35.
  • Test NPM. To see if NPM is installed, type npm -v in Terminal. This should print NPM’s version number so you’ll see something like this 1.4.28
  • Create a test file and run it. A simple way to test that node.js works is to create a JavaScript file: name it hello.js, and just add the code console.log('Node is installed!');. To run the code simply open your command line program, navigate to the folder where you save the file and type node hello.js. This will start Node and run the code in the hello.js file. You should see the output Node is installed!.

 How to Update Node and NPM

New versions of Node and NPM come out frequently. To install the updates, just download the installer from the Nodejs.org site and run it again. The new version of Node and NPM will replace the older versions.

How to Uninstall Node and NPM

You uninstall Node.js and NPM the same as you would most Windows software:
  1. Open the Windows Control Panel
  2. Choose the “Programs and Features” option
  3. Click the “Uninstall a program” option
  4. Select Node.js, and click the Uninstall link.
With Node.js and NPM installed you’ll soon be able to take advantage of the huge world of NPM modules that can help with a wide variety of tasks both on the web server and on your desktop (or laptop) machine. The NPM site lists all of the official Node packages making it easy to make the choice. Have fun and check out my current courses at Treehouse. And after, you’ve installed Node, check out the Node.js Basics course on Treehouse by my colleague, Andrew Chalkley.

Thursday, February 15, 2018

Python

Getting Started with Python Programming for Windows Users

Installation of Python

  • Download the current production version of Python (2.7.1) from the Python Download site.
  • Double click on the icon of the file that you just downloaded.
  • Accept the default options given to you until you get to the Finish button. Your installation is complete.

Setting up the Environment

  • Starting at My Computer go to the following directory C:\Python27. In that folder you should see all the Python files.
  • Copy that address starting with C: and ending with 27 and close that window.
  • Click on Start. Right Click on My Computer.
  • Click on Properties. Click on Advanced System Settings or Advanced.
  • Click on Environment Variables.
  • Under System Variables search for the variable Path.
  • Select Path by clicking on it. Click on Edit.
  • Scroll all the way to the right of the field called Variable value using the right arrow.
  • Add a semi-colon (;) to the end and paste the path (to the Python folder) that you previously copied. Click OK.

Writing Your First Python Program

  • Create a folder called PythonPrograms on your C:\ drive. You will be storing all your Python programs in this folder.
  • Go to Start and either type Run in the Start Search box at the bootom or click on Run.
  • Type in notepad in the field called Open.
  • In Notepad type in the following program exactly as written:
# File: Hello.py

print "Hello World!"

  • Go to File and click on Save as.
  • In the field Save in browse for the C: drive and then select the folder PythonPrograms.
  • For the field File name remove everything that is there and type in Hello.py.
  • In the field Save as type select All Files
  • Click on Save. You have just created your first Python program.

Running Your First Program

  • Go to Start and click on Run.
  • Type cmd in the Open field and click OK.
  • A dark window will appear. Type cd C:\ and hit the key Enter.
  • If you type dir you will get a listing of all folders in your C: drive. You should see the folder PythonPrograms that you created.
  • Type cd PythonPrograms and hit Enter. It should take you to the PythonPrograms folder.
  • Type dir and you should see the file Hello.py.
  • To run the program, type python Hello.py and hit Enter.
  • You should see the line Hello World!
  • Congratulations, you have run your first Python program.

Getting Started with Python Programming for Mac Users

Python comes bundled with Mac OS X. But the version that you have is quite likely an older version. Download the latest binary version of Python that runs on both Power PC and Intel systems and install it on your system.

Writing Your First Python Program

  • Click on File and then New Finder Window.
  • Click on Documents.
  • Click on File and then New Folder.
  • Call the folder PythonPrograms. You will be storing all class related programs there.
  • Click on Applications and then TextEdit.
  • Click on TextEdit on the menu bar and select Preferences.
  • Select Plain Text.
  • In the empty TextEdit window type in the following program, exactly as given:
# File: Hello.py

print "Hello World!"

  • From the File menu in TextEdit click on Save As.
  • In the field Save As: type Hello.py.
  • Select Documents and the file folder PythonPrograms.
  • Click Save.

Running Your First Program

  • Select Applications, then Utilities and Terminal.
  • In your Terminal window type ls and Return. It should give a listing of all the top level folders. You should see the Documents folder.
  • Type cd Documents and hit Return.
  • Type ls and hit Return and you should see the folder PythonPrograms.
  • Type cd PythonPrograms and hit Return.
  • Type ls and hit return and you should see the file Hello.py.
  • To run the program, type python Hello.py and hit Return.
  • You should see the line Hello World!
  • Congratulations, you have run your first Python program.

Starting IDLE on Mac

  • In a Terminal window, type python. This will start the Python shell. The prompt for that is >>>
  • At the Python shell prompt type import idlelib.idle
  • This will start the IDLE IDE

Using IDLE on either Windows or Mac

  • Start IDLE
  • Go to File menu and click on New Window
  • Type your program in
  • Go to File menu and click on Save. Type in filename.py This will save it as a plain text file, which can be opened in in any editor you choose (like Notepad or TextEdit).
  • To run your program go to Run and click Run Module 


  • You can run the pip install pypiwin32 in case you get missing module error while importing anything lib
  • https://automatetheboringstuff.com/

Wednesday, January 31, 2018

Chatbots

<a href="https://developer.ibm.com/courses/all/chatbots-for-good-empathetic-chatbots?cm_mmc=dw-_-edtech-_-GWC-_-sticker"><img src="https://developer.ibm.com/courses/wp-content/uploads/sites/83/chatbot-sticker.png" alt="I took the Chatbots for good course and earned a badge! You can earn one too!" /></a>

Friday, January 26, 2018

BlockChain Technology

In simple terms it's an enhanced distributed ledger, i.e decentralized ledger.

The following are few sample industries where we can implement blockchain technology.
Financial applications,
Retails
Supply Chain
DealerShips
Dimond industry etc.

A walk thru of a business case..

Let's talk about car dealer ship where there are multiple parties involved in the process of reaching the car from the manufacturer to the end consumer, such as..

1) Manufacturer
2) Distributor
3) Dealer
4) Consumer
5) Consumer 2 etc.


Thursday, January 18, 2018

Using Shared Libraries in IIB v10


IBM Integration Bus v10 has introduced many new features. One of the important feature, from my point of view, is the introduction of Shared Library concept.
We all know that WebSphere Message Broker v8 provided new ways of organizing resources in toolkit by introducing
  • Application container, as per the info-center, is a container for all the resources that are required to create a solution.
    • Provides run-time isolation –> resources inside the application are not visible to other resources
    • Used when updates to one group of deployed resources should not affect another group of deployed resources
  • Library container, for organizing resources for re-usability. Can be referenced by applications or services or integration projects.
    • WMB v8 introduced Static library
The behavior of the library container introduced in WMB 8 and used in IIB v9, as per info-center are provided below
StaticLib
Drawback of Library used in WMB 8 / IIB 9: Owing to Application / Service’s run time isolation behavior, we solution developers faced major challenges on deciding whether to organize our solution using Applications / Services or using Integration Projects.Whensolutions were organized using Applications / Services and the reusable artifact(s), like Common Error Handling framework / logging framework, organized using libraries, each application / services carried copy of library within themselvesAs a result, any changes made to these reusable artifact always resulted in need to re-deploy all applications / services.
In that regards, organizing the resources as Integration Projects was better and very much appealing.
But IIB v10 has addressed this concern / problem by introducing Shared Libraries. Now the Applications / Services do not take copy of the Shared Library within themselves. As the Shared Libraries are deployed directly at the Integration Server level.
Advantages of Shared Libraries
  1. Shared Libraries can be added to the BAR file independently of referencing Applications / Services
  2. Deployment of updated Shared Library results in the changes immediately picked up by all referencing applications / services at run-time. Hence no need to redeploy all referencing applications / services
  3. Enables using / referencing to multiple XML or DFDL schema files that declare the same elements and types, by having them stored in separate Shared Libraries
SharedLib
Shared Library vs Static Library from Toolkit to Run-time
  • In the New Library window, specify the name for the library and selecting the library type as “Shared Library”, click FinishLoggerSL
  • Below Images shows the Shared and Static libraries in the toolkit
StaticVsShared
  • Referencing to Shared Library / Static library from Application is shown belowLibReferences
  • When adding to the BAR file, Shared Libraries are displayed in the BAR Editor separately and have to be selected explicitly for adding to the bar file. This is not the case with Static Library as they are added automatically when application referencing them is added to BAR file.
BAREditor
  • After deployment, you could notice the difference between Shared & Static library. Static library copy will be present within the application container, where as the Shared Library is outside the application container and directly under the Integration Server.
Runtime
Hope this blog provides insight into Shared Library feature of IIB 10.


Wednesday, December 20, 2017

IIB Read bar file properties

Navigate to the path on the console where the bar files exist..

mqsireadbar -b BA.bar -r > BA.properties

Git with ssl cert issues

xyz /c/Users/path/IBM
$ git config --global http.sslVerify false

xyz /c/Users/path/IBM
$

Distributed Computing: A Guide to Comparing Data Between Hive Tables Using Spark

In big data, efficient data comparison is essential for ensuring data integrity and validating data migrations. Apache Spark, with its in-me...